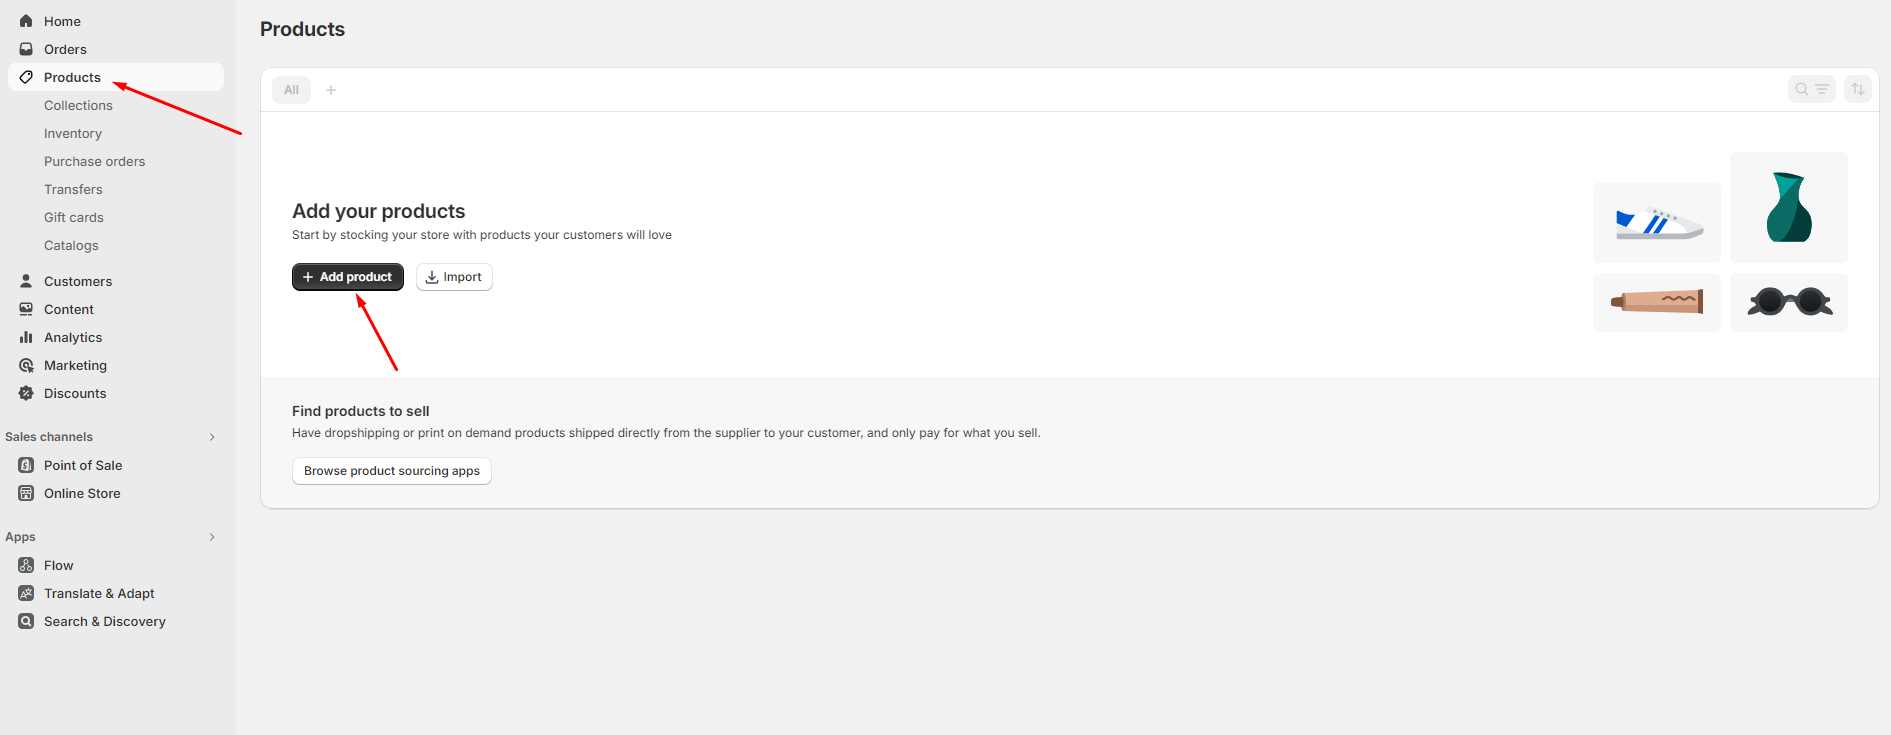
Create Product
Step 1
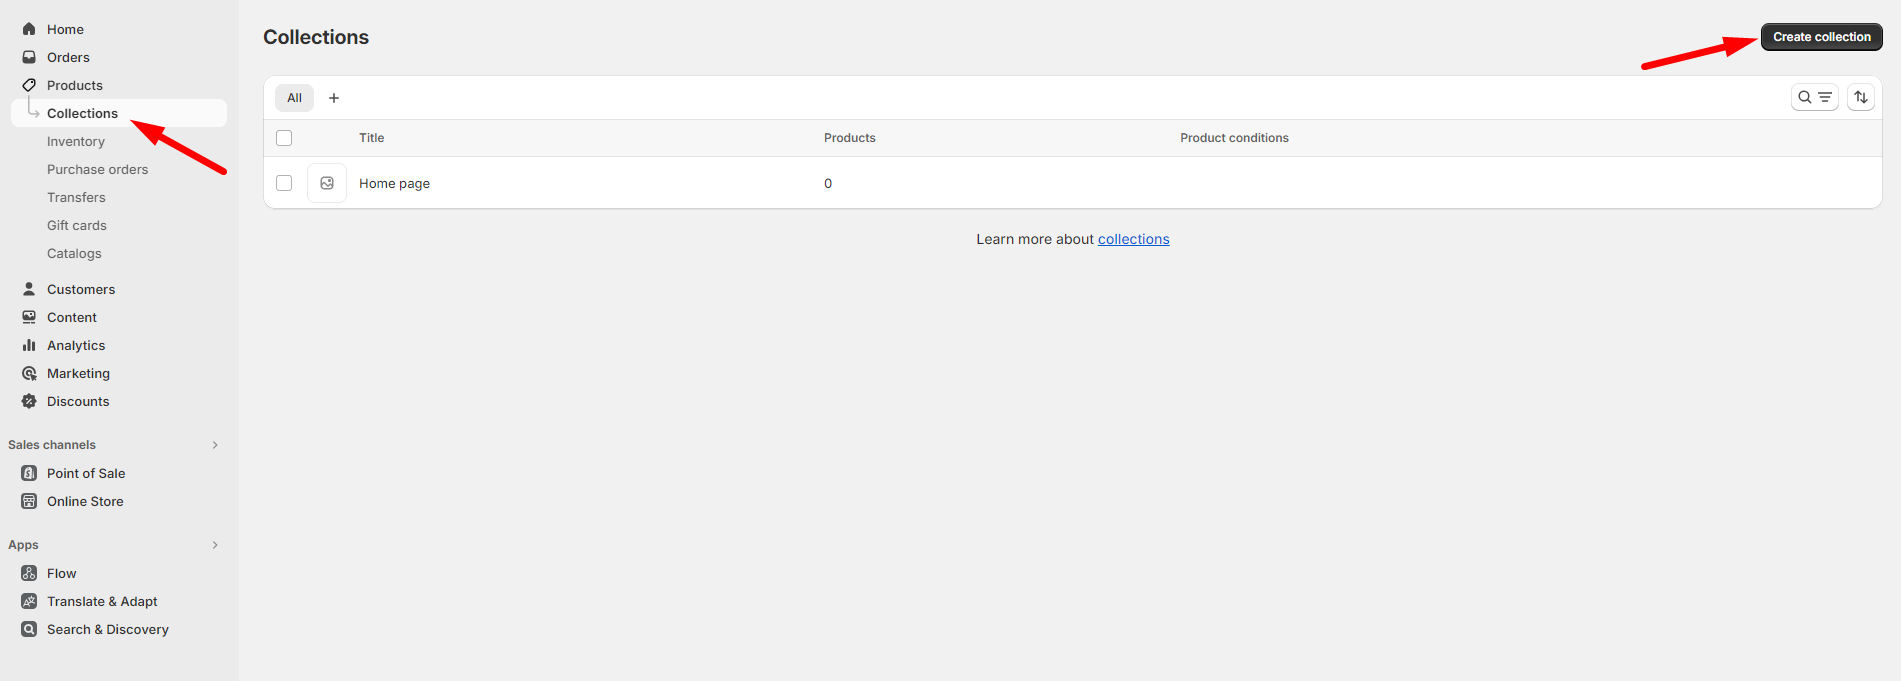
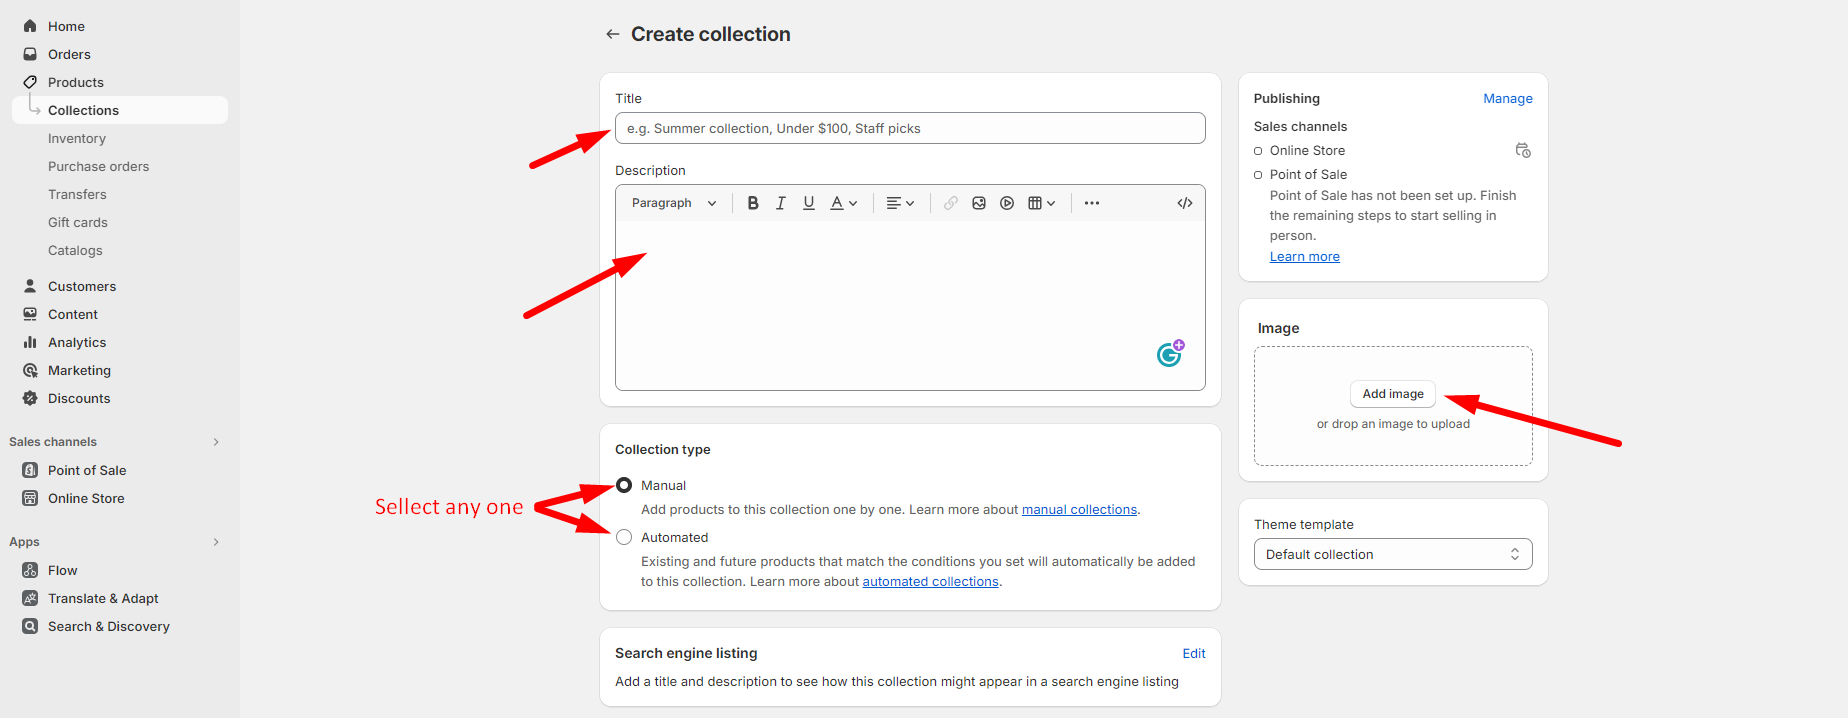
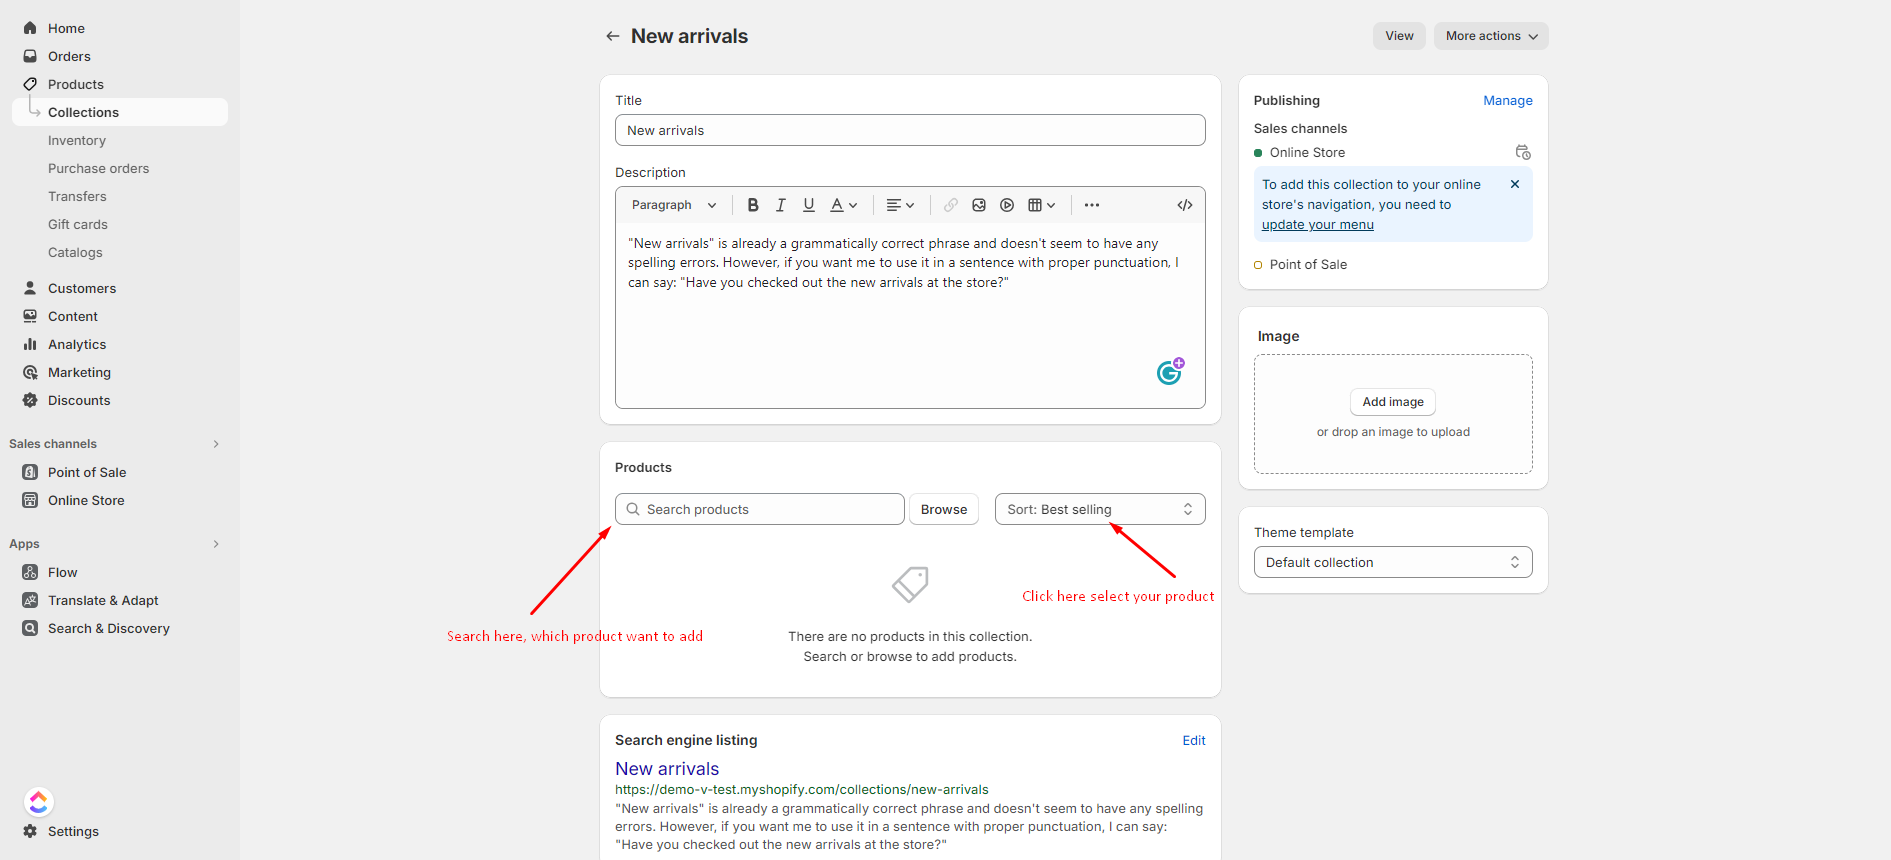
- From your Shopify admin, Go to Products.
- Click the "Add product" button
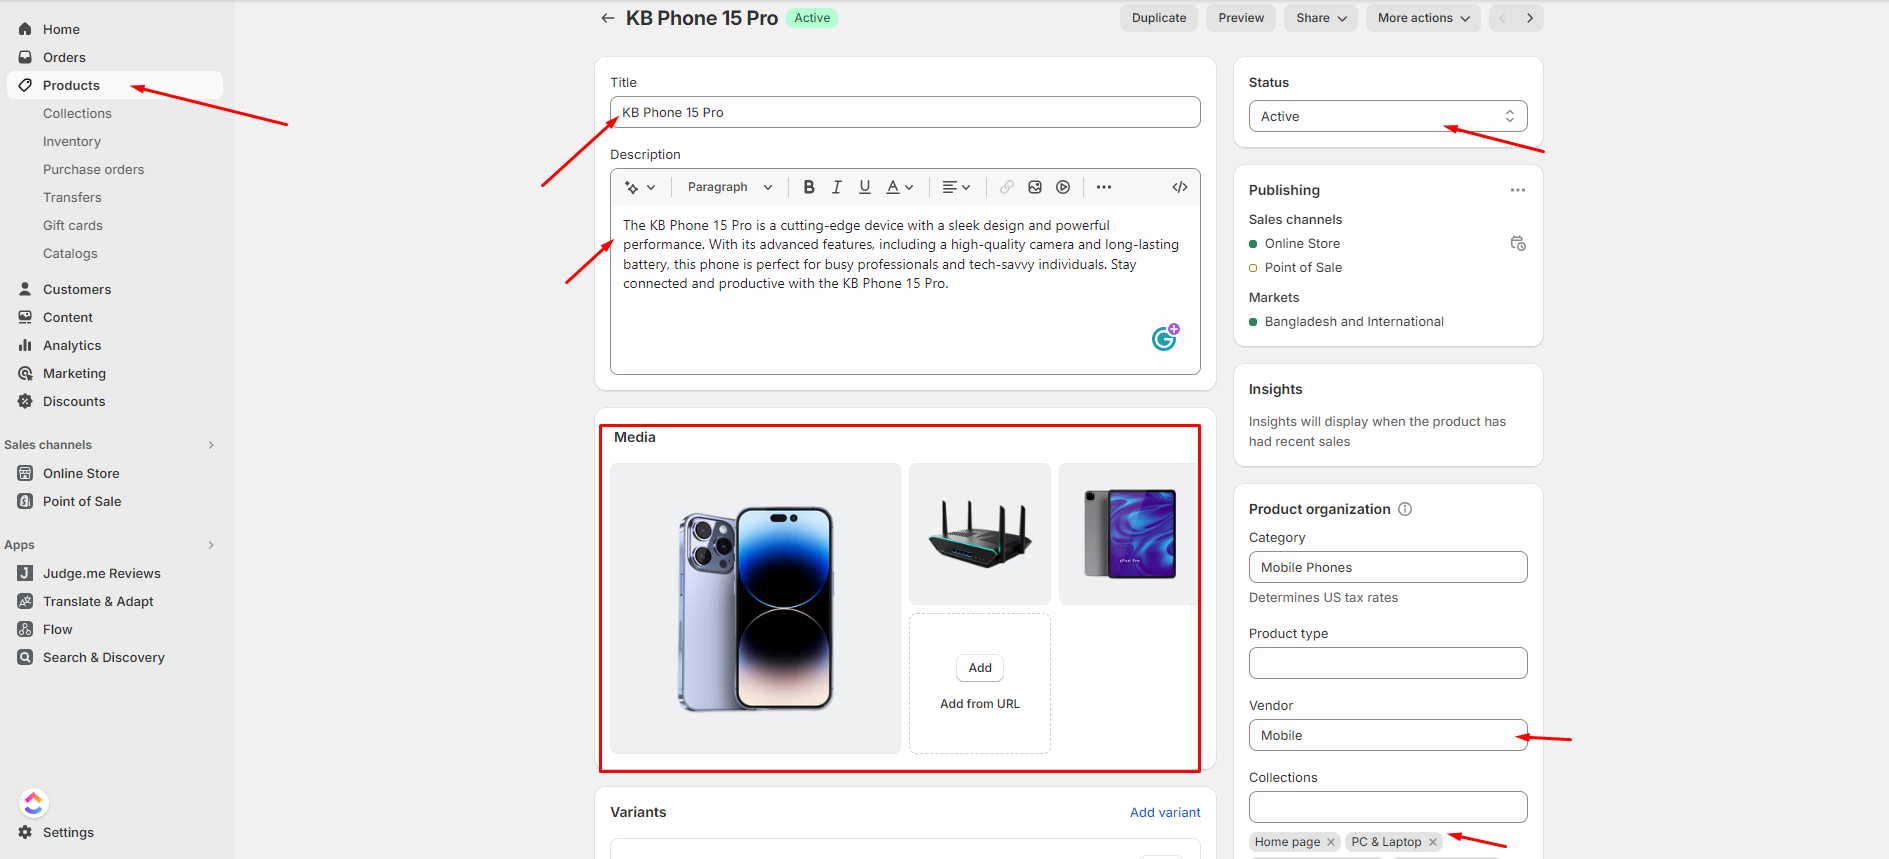
Product Image Recommended Size
You can Upload the product images following these instructions.
- Portrait: Image height should be more than the width. Example of: 1000x1200
- Square: Image width and height should be the same. Example of: 1200x1200
- landscape: Image width should be more than the height. Example of: 1200x800"
Step 2
Read More
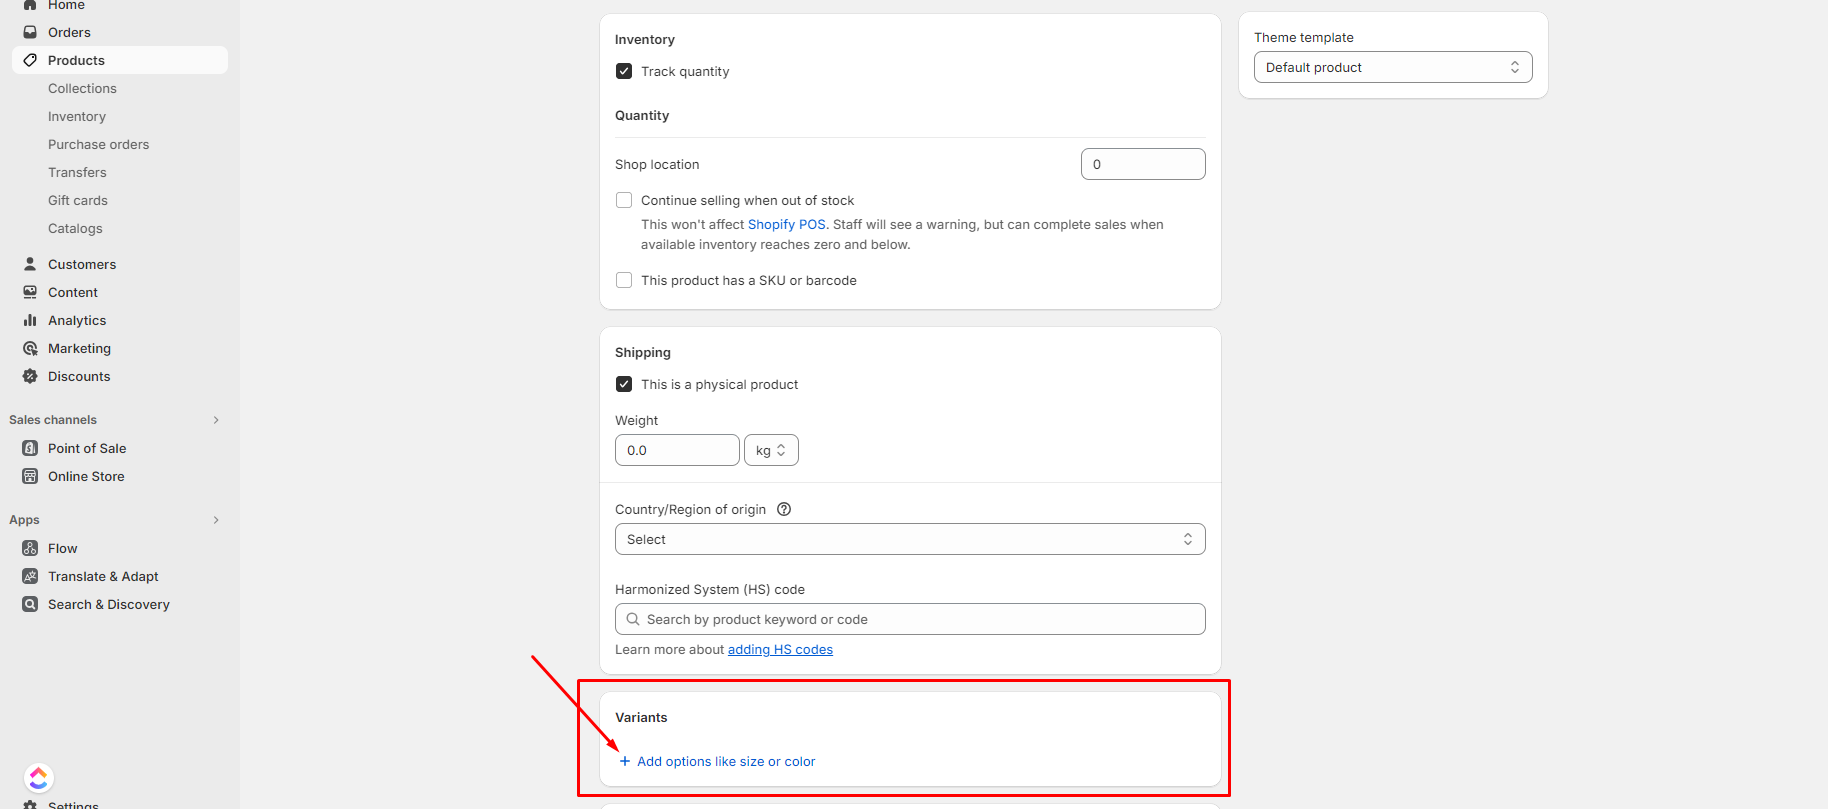
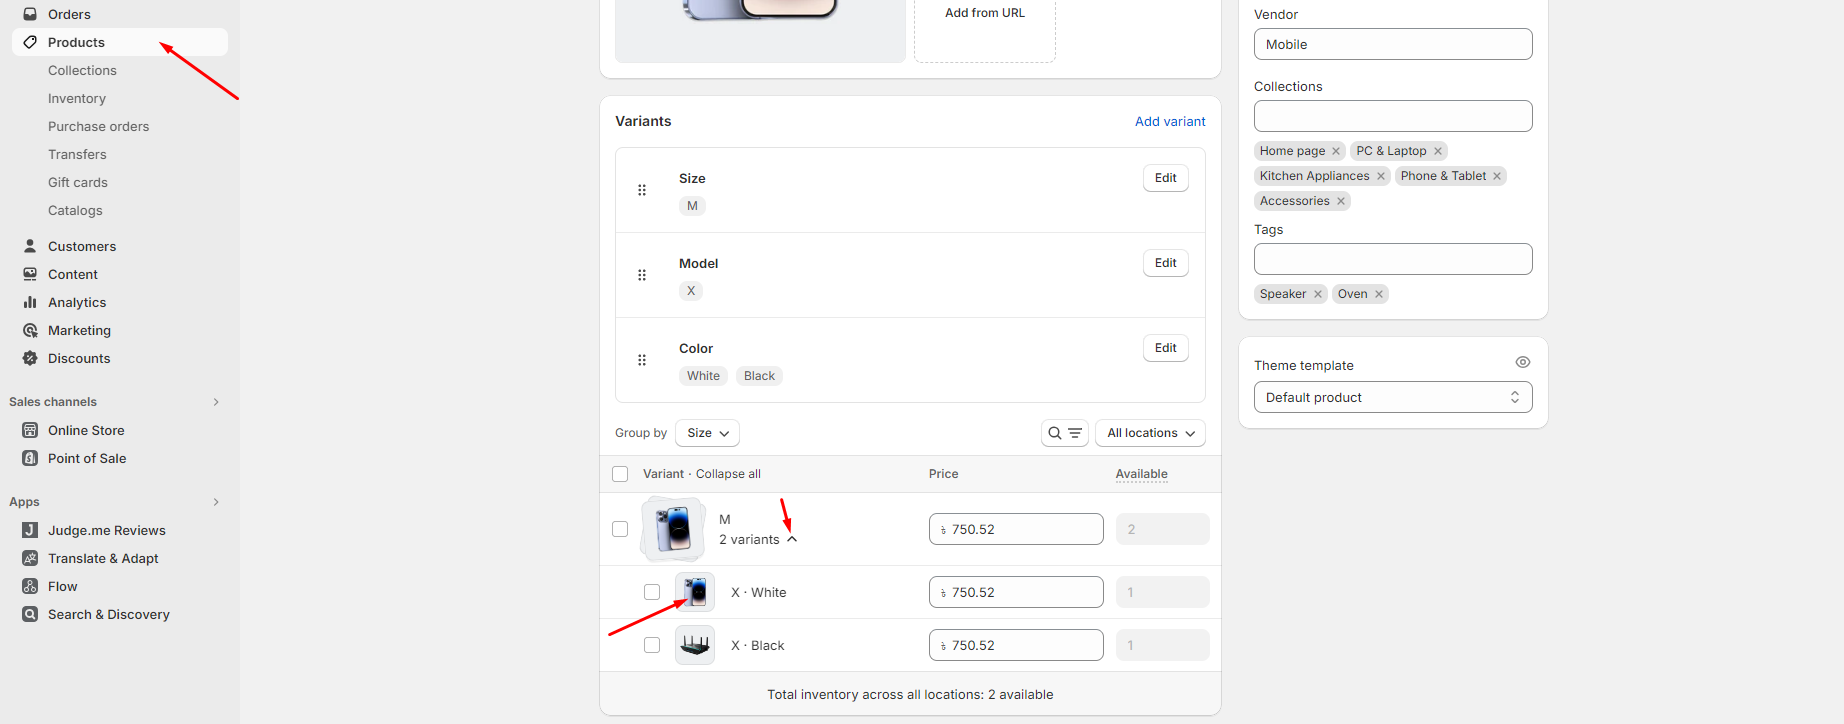
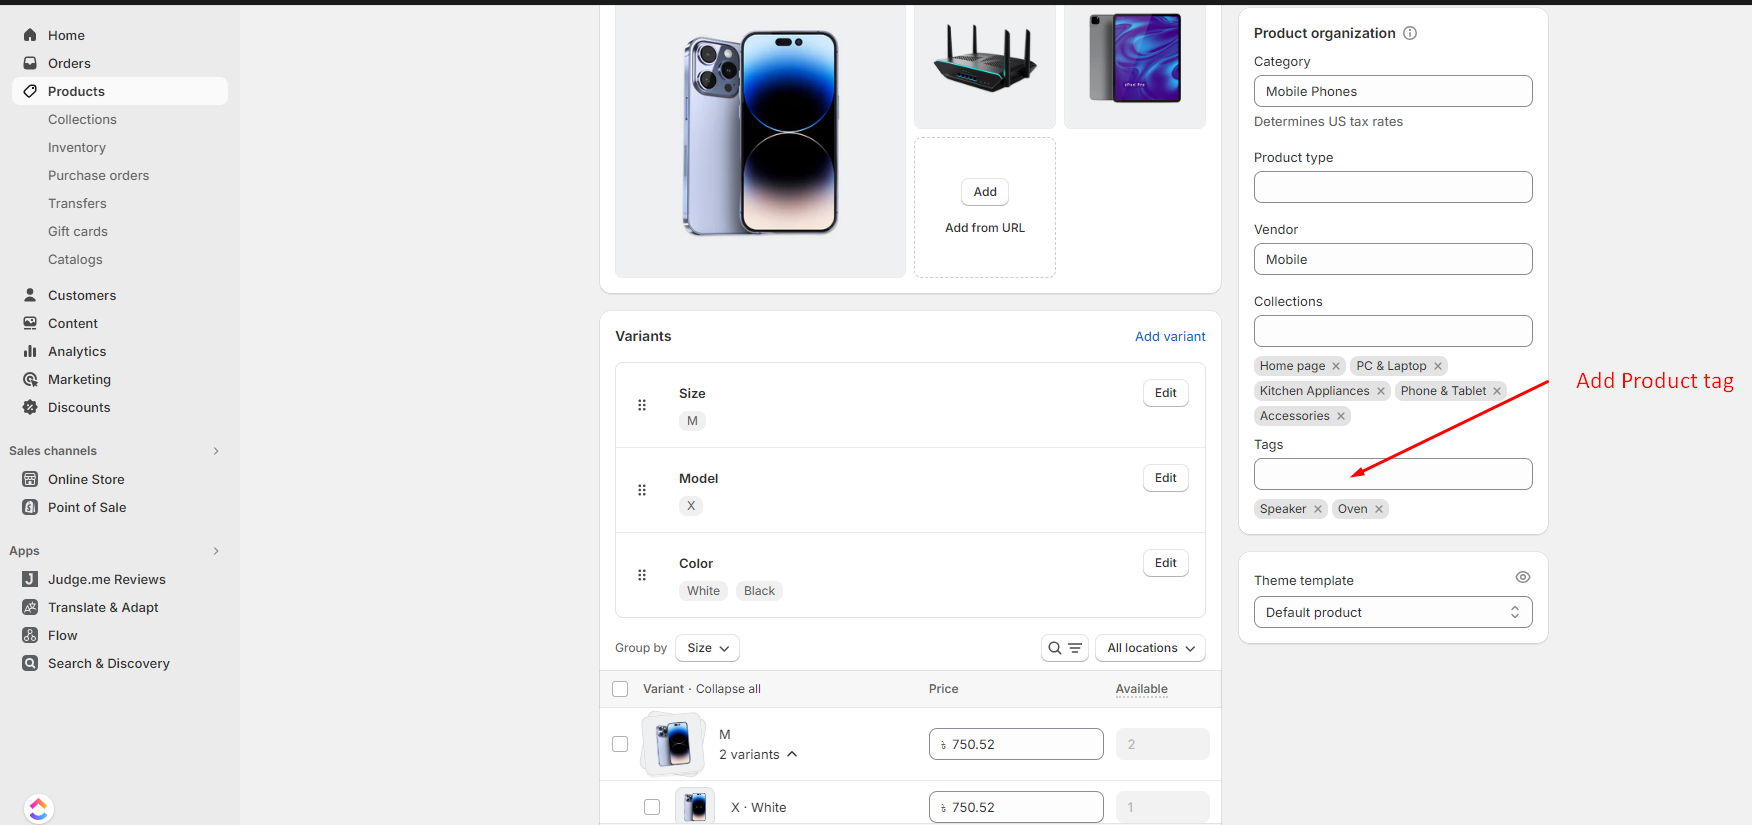
Product Variants
Read More
Step 1
- When add product then add variant for this product.
Step 2
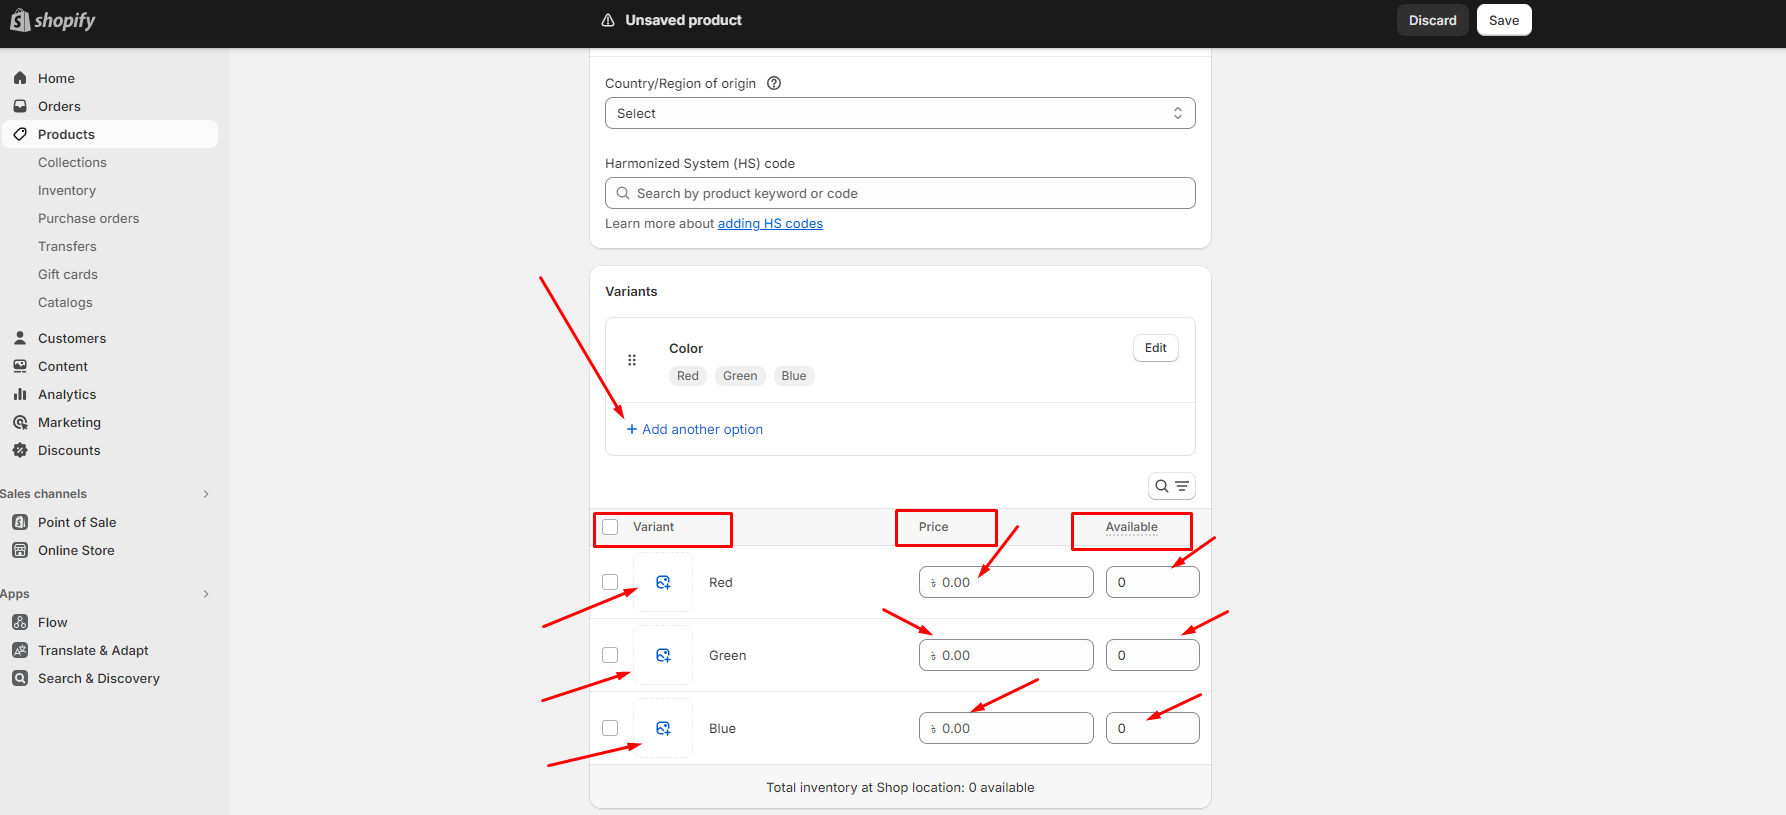
Step 3
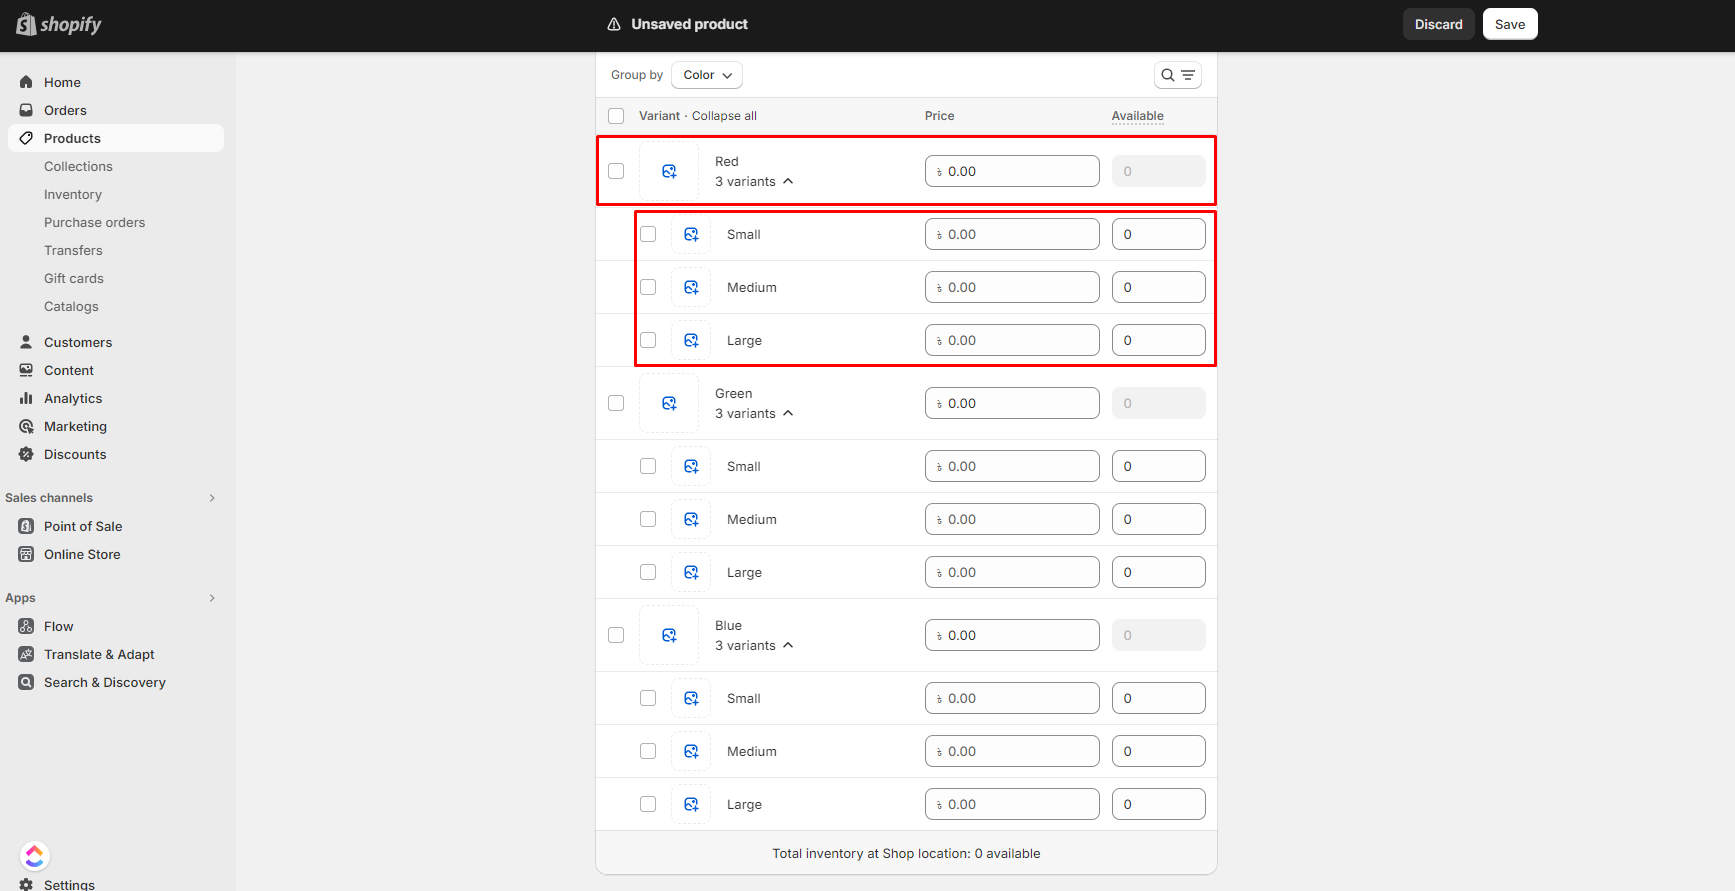
Step 4
- If you add image for variant then this image will display in swatch color variant field
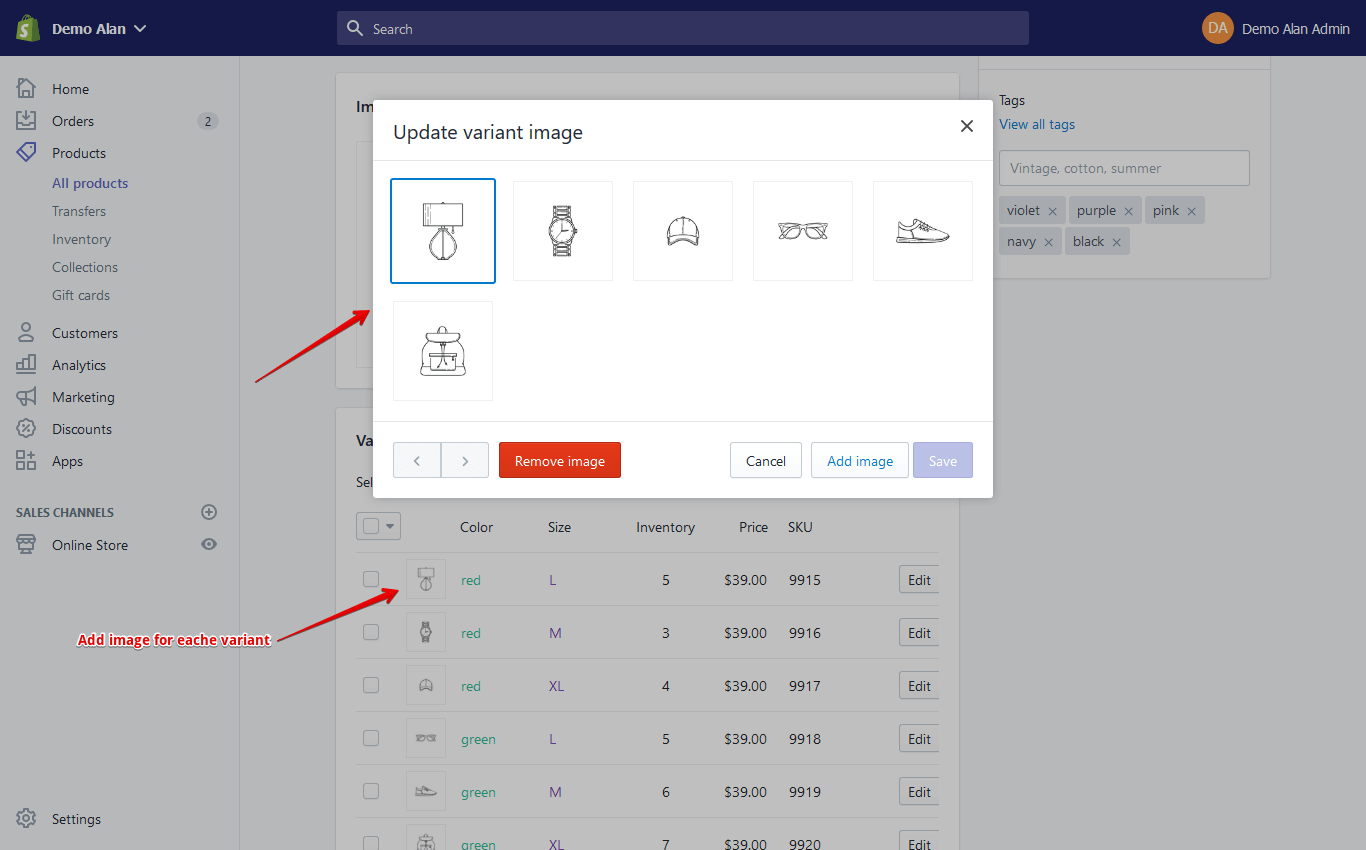
- This variant is displaying in product swatch option
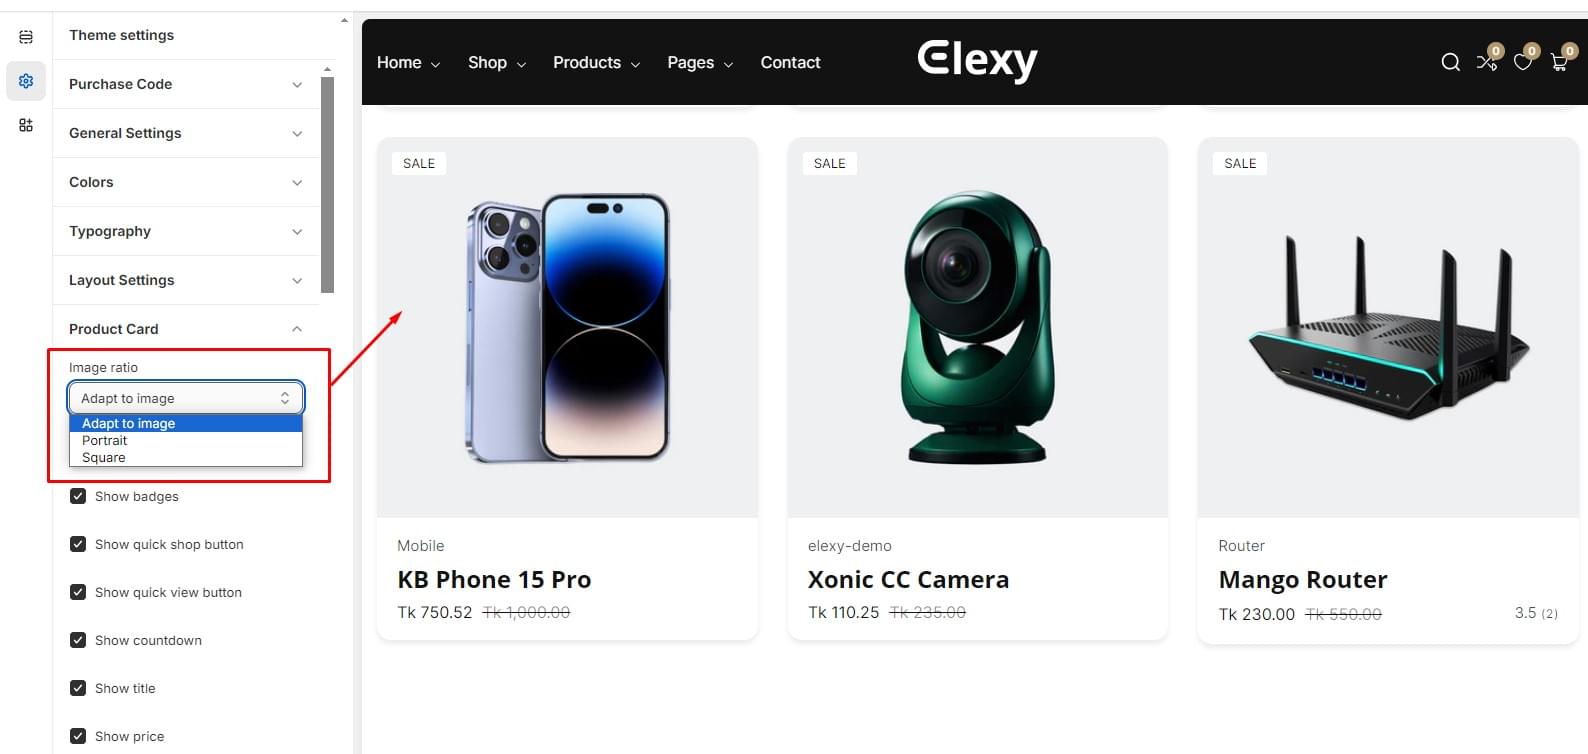
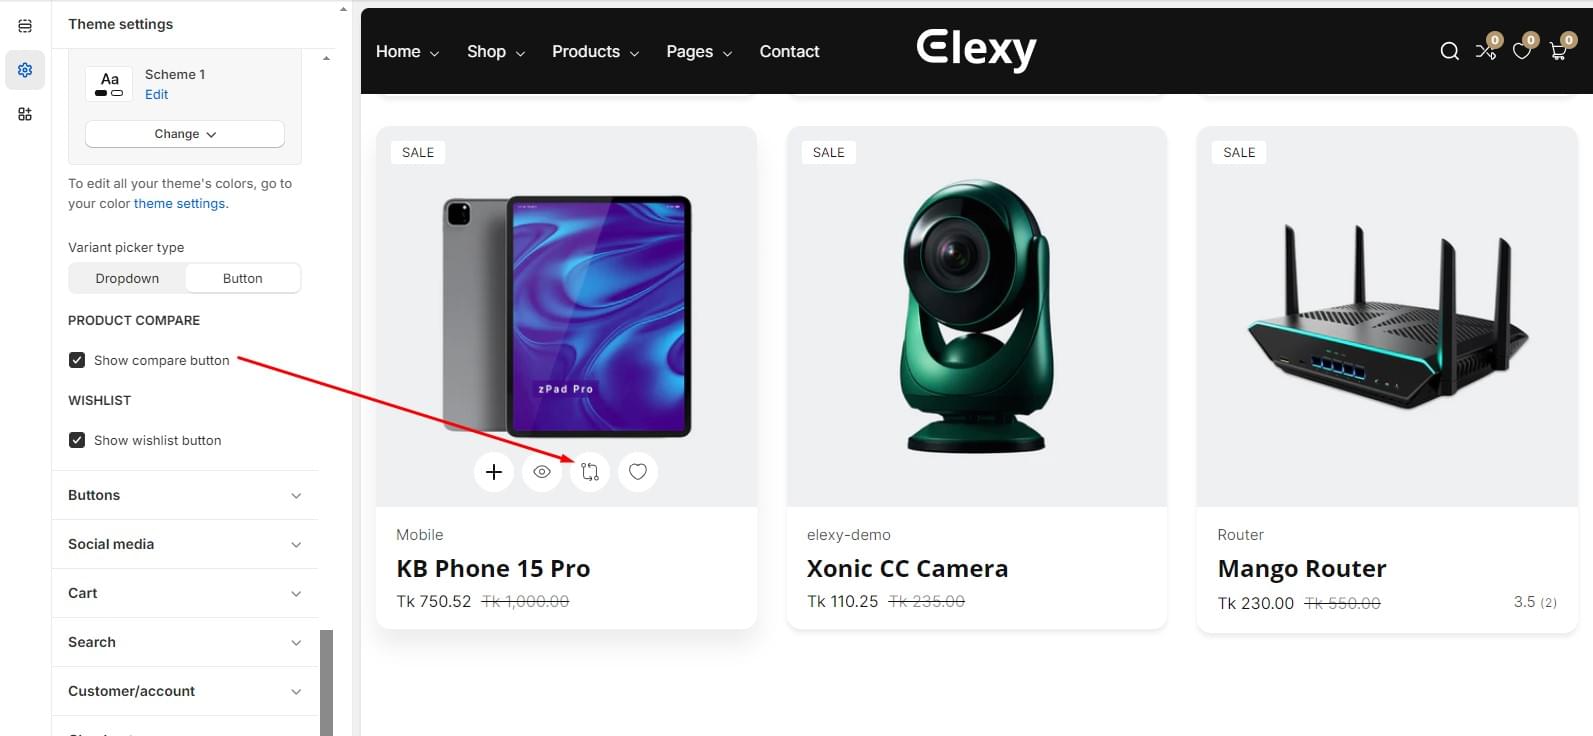
Product Item Settings
- Go to Customizer > Theme Settings > Product Item Settings

- Step 1 > Hover Child/Secondary Image
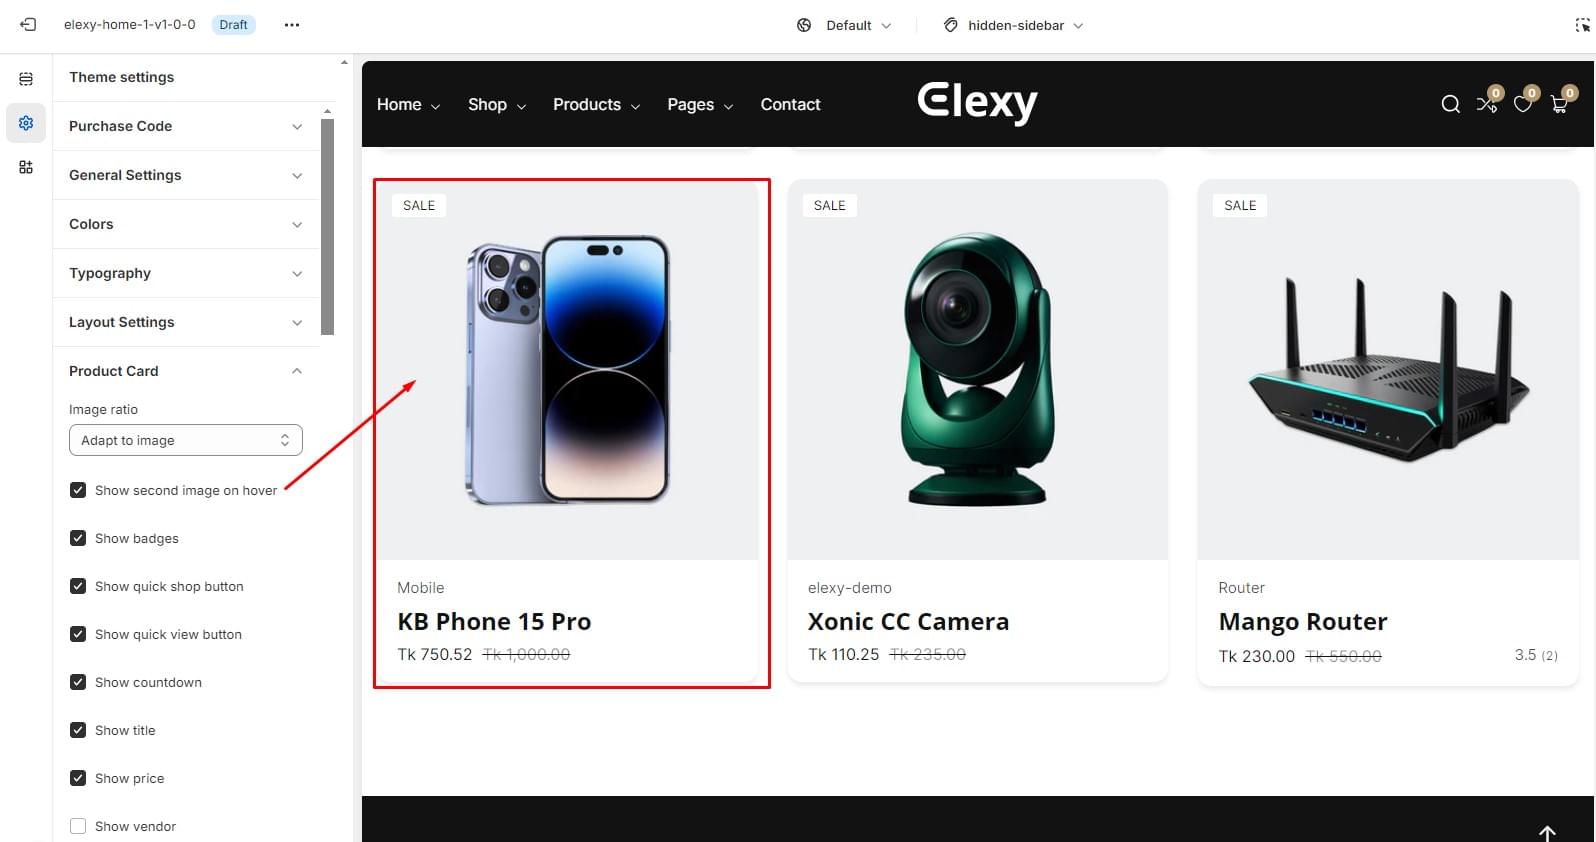
- Step 2 > Image Size
- Step 7 > Wishlist

- Step 8 > Compare
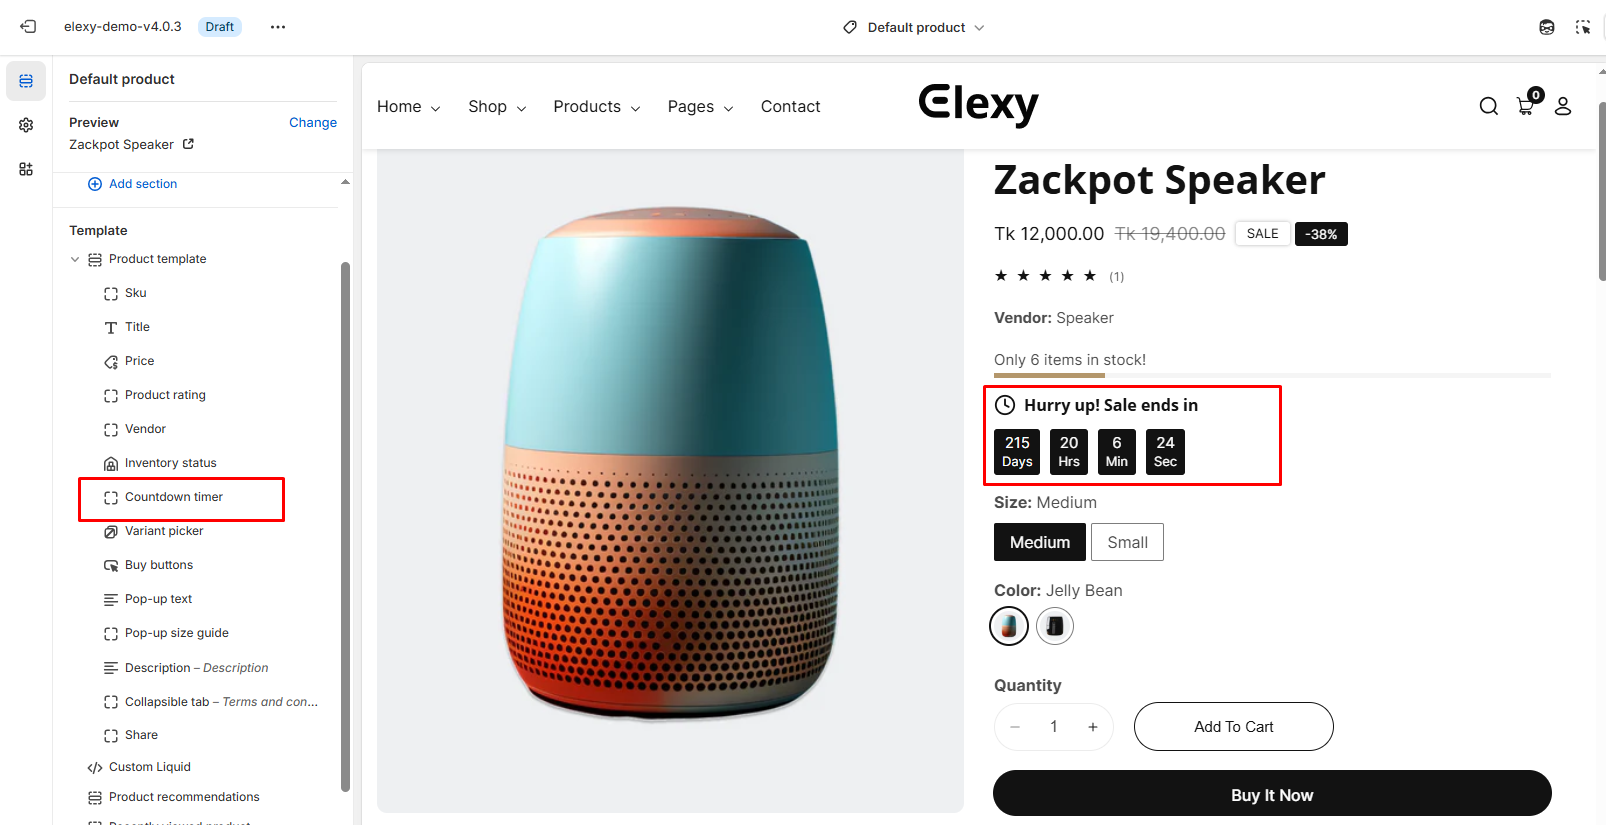
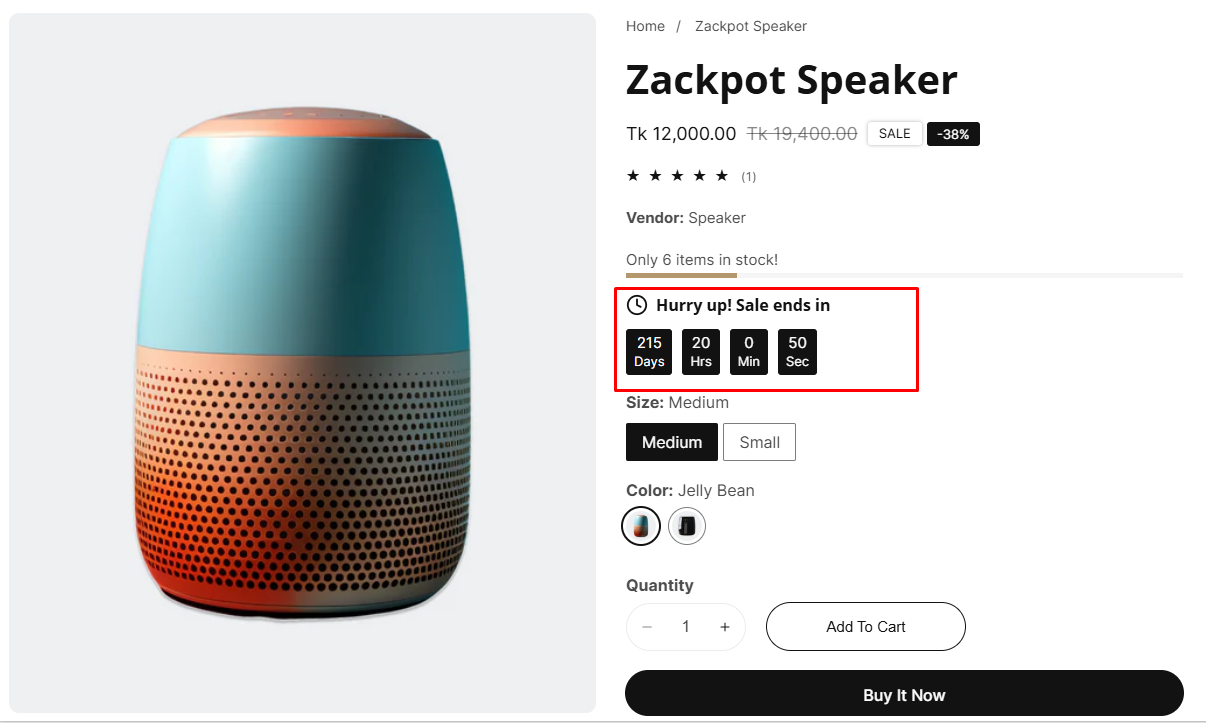
How to add product countdown
displaying a countdown timer on a product that counts down to the discount expiry date. The timers are a great way to create a sense of urgency for your product discounts and thereby encourage customers to buy before it’s too late.
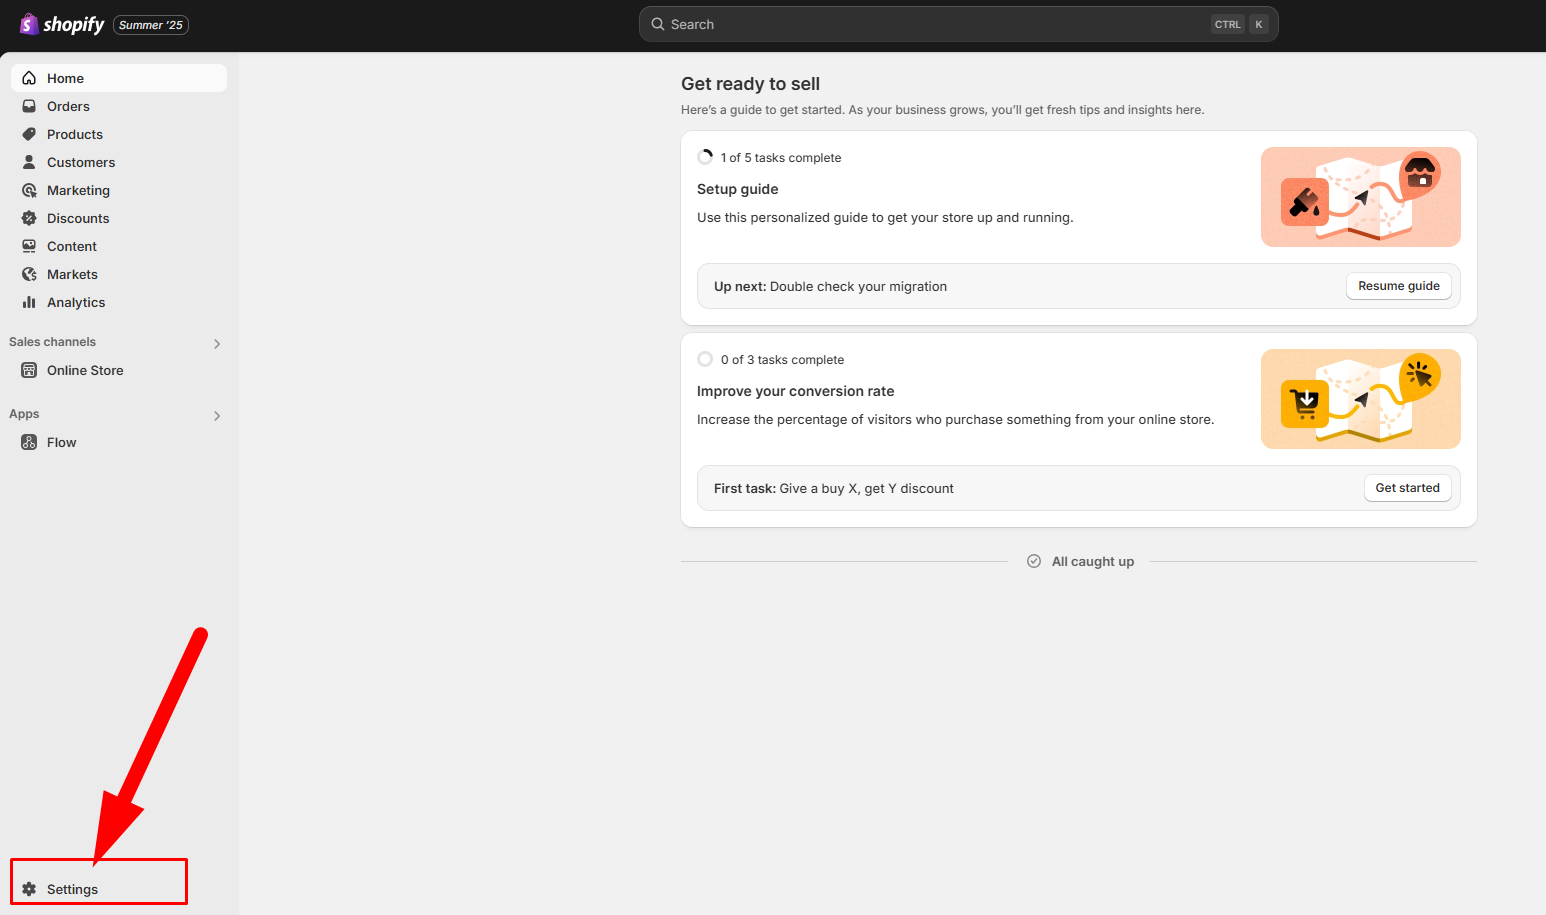
- From your Shopify admin, go to Settings > Custom data > Products
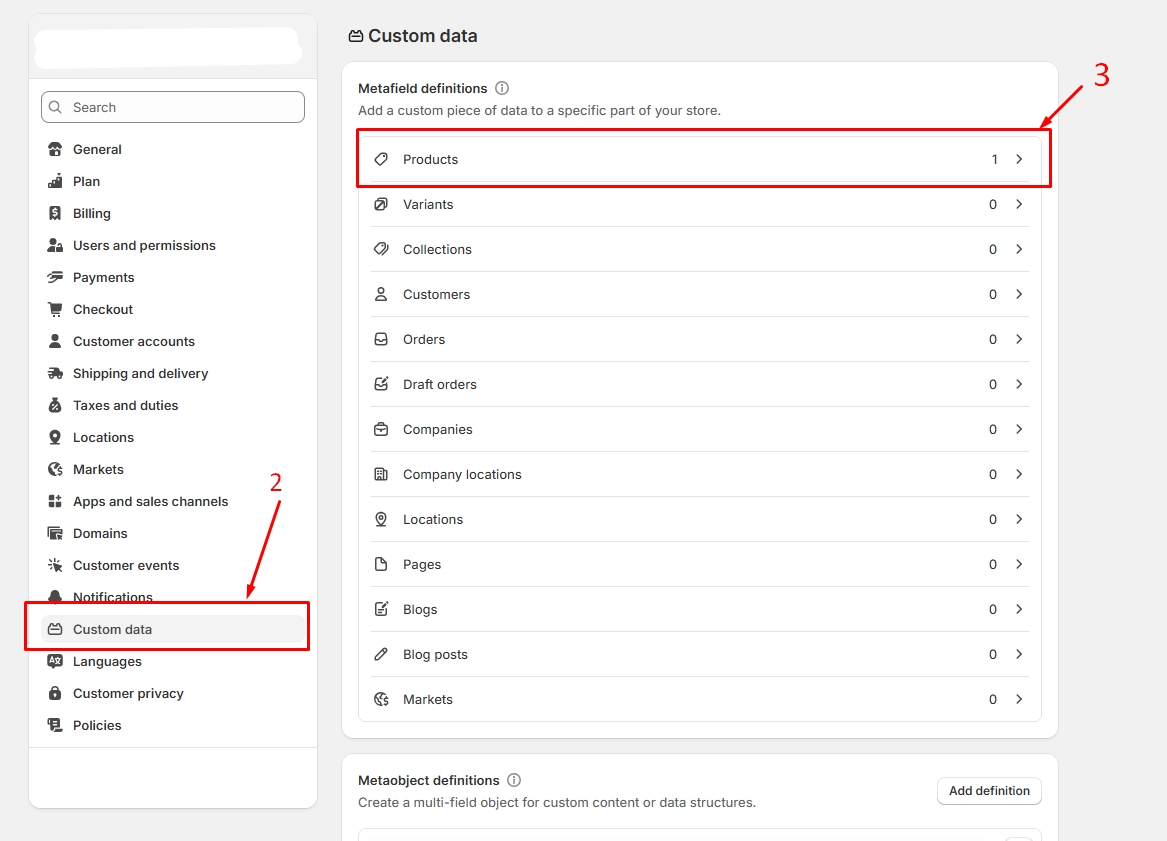
- 2. Click > Add definition
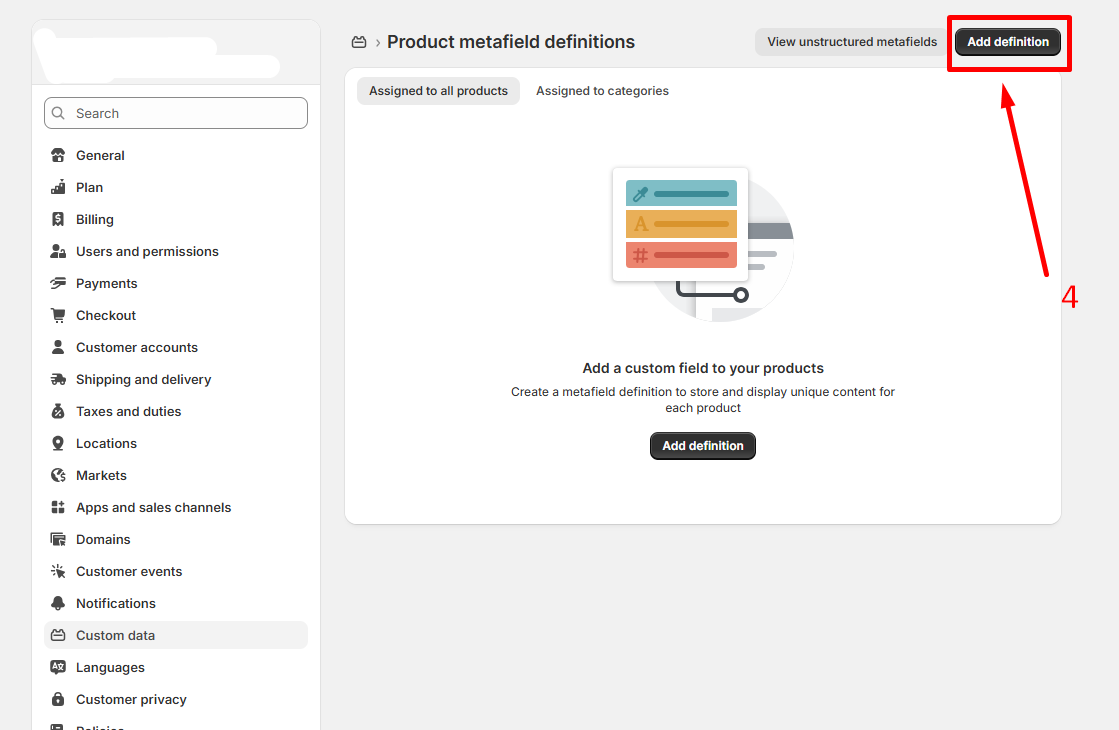
- 3. In the Name field enter Product countdown and then click the ‘Product countdown‘ generated as you type from the list. This is the metafied used for storing the expiry date
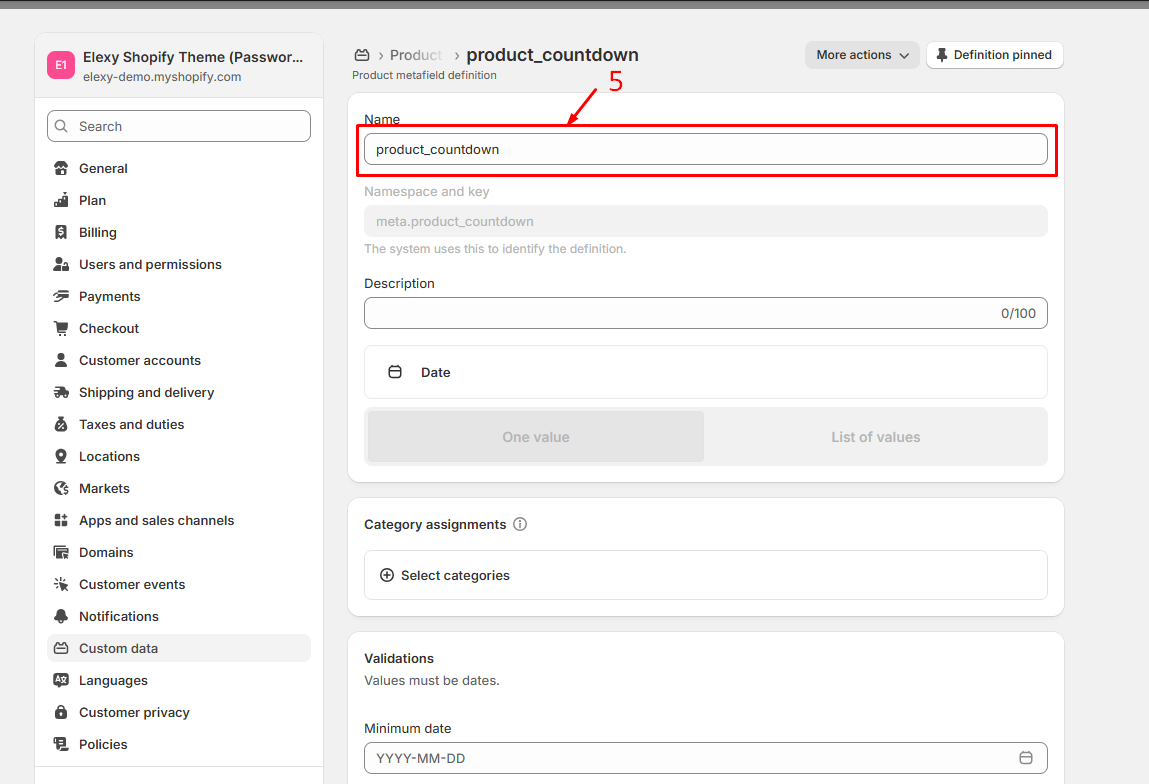
- 4. In the Namespace and key field enter meta.product_countdown And Select content type then select Date
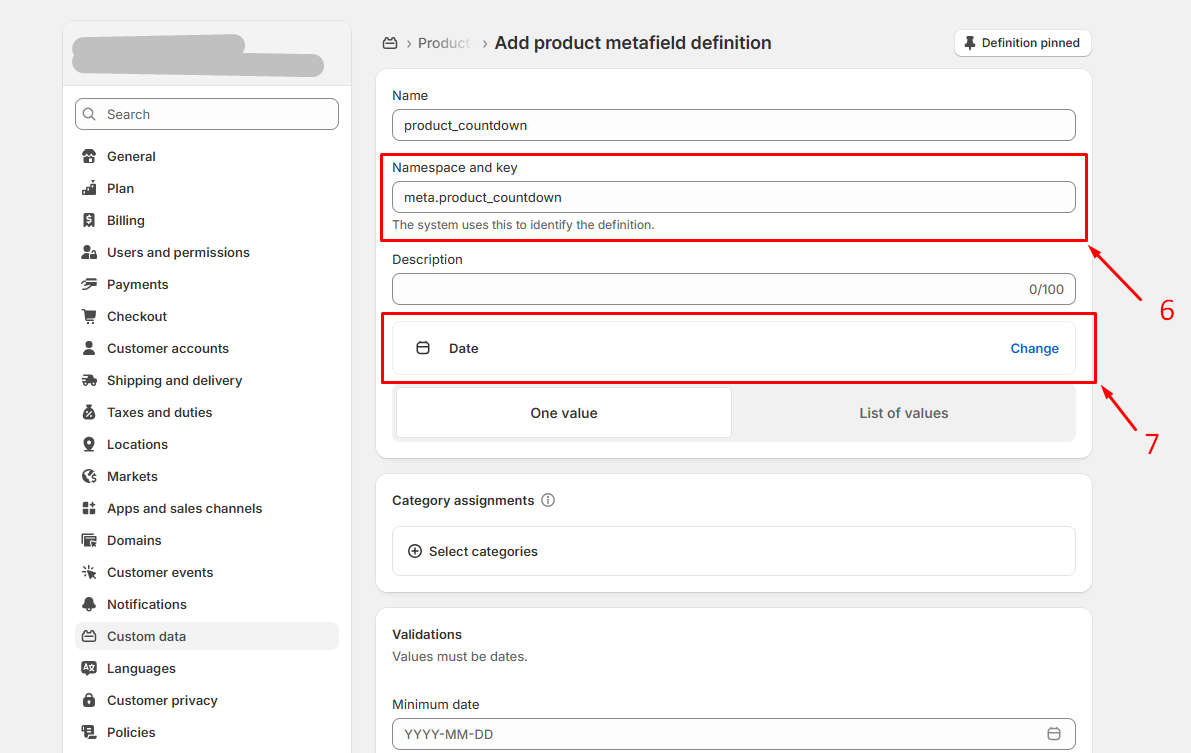
- 5. Click Save to save the definition.
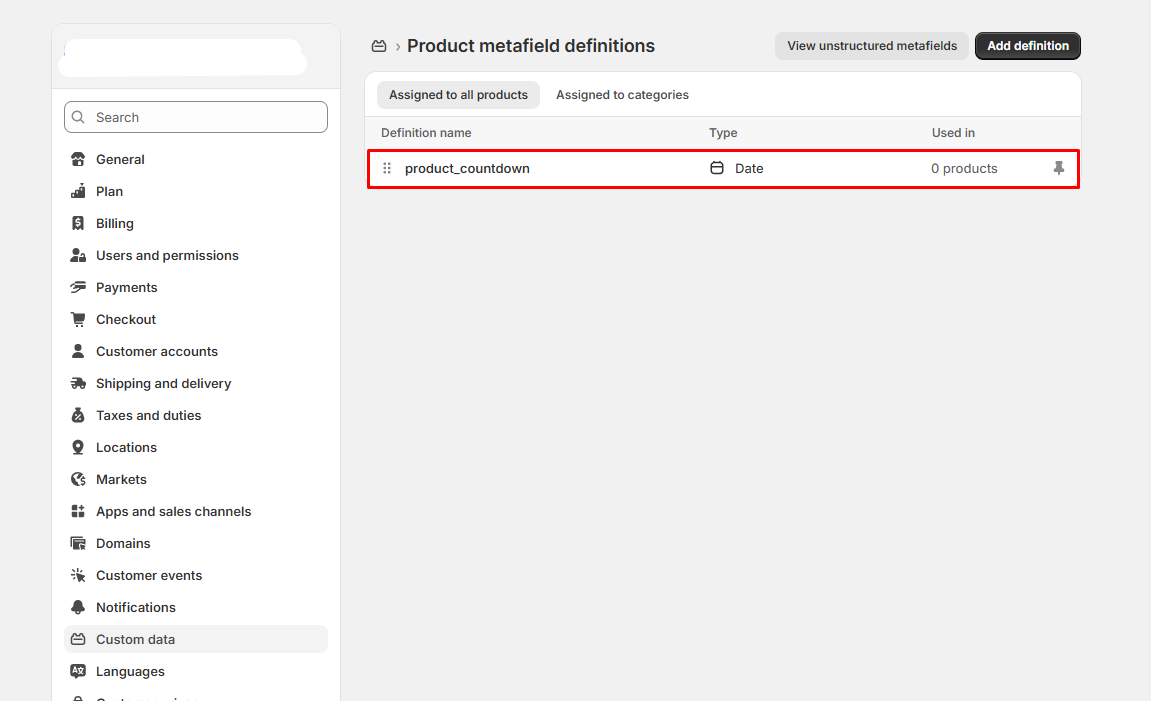
- 6. You should see the Product countdown in the list of definitions by now.
Setting the countdown
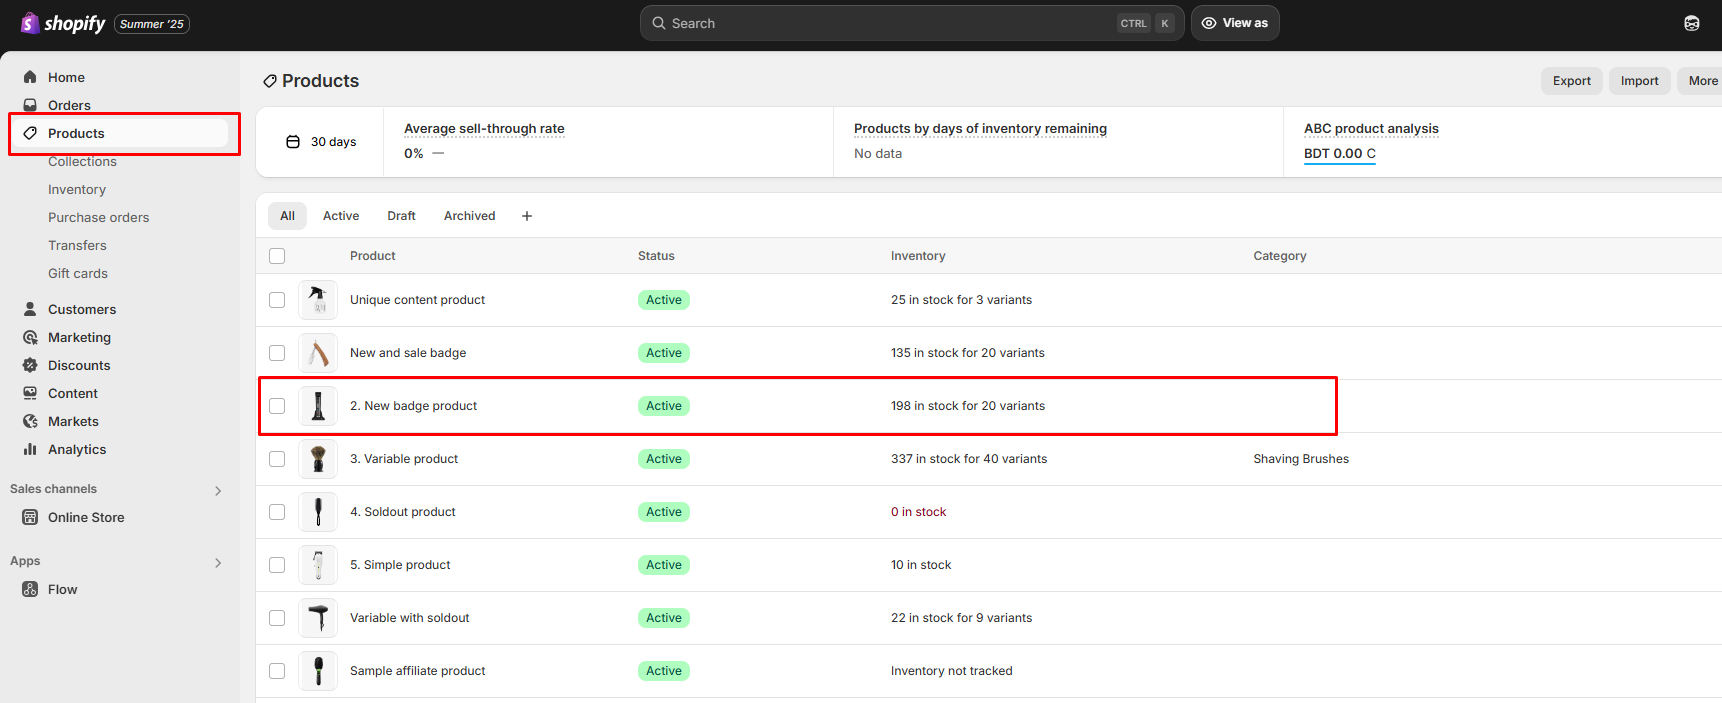
- 1. In your admin, within Products, click on the product you want to add the countdown
- 2. You should see the Product countdown here
- To set an expiry time, click on the Product countdown field. And set the date you want
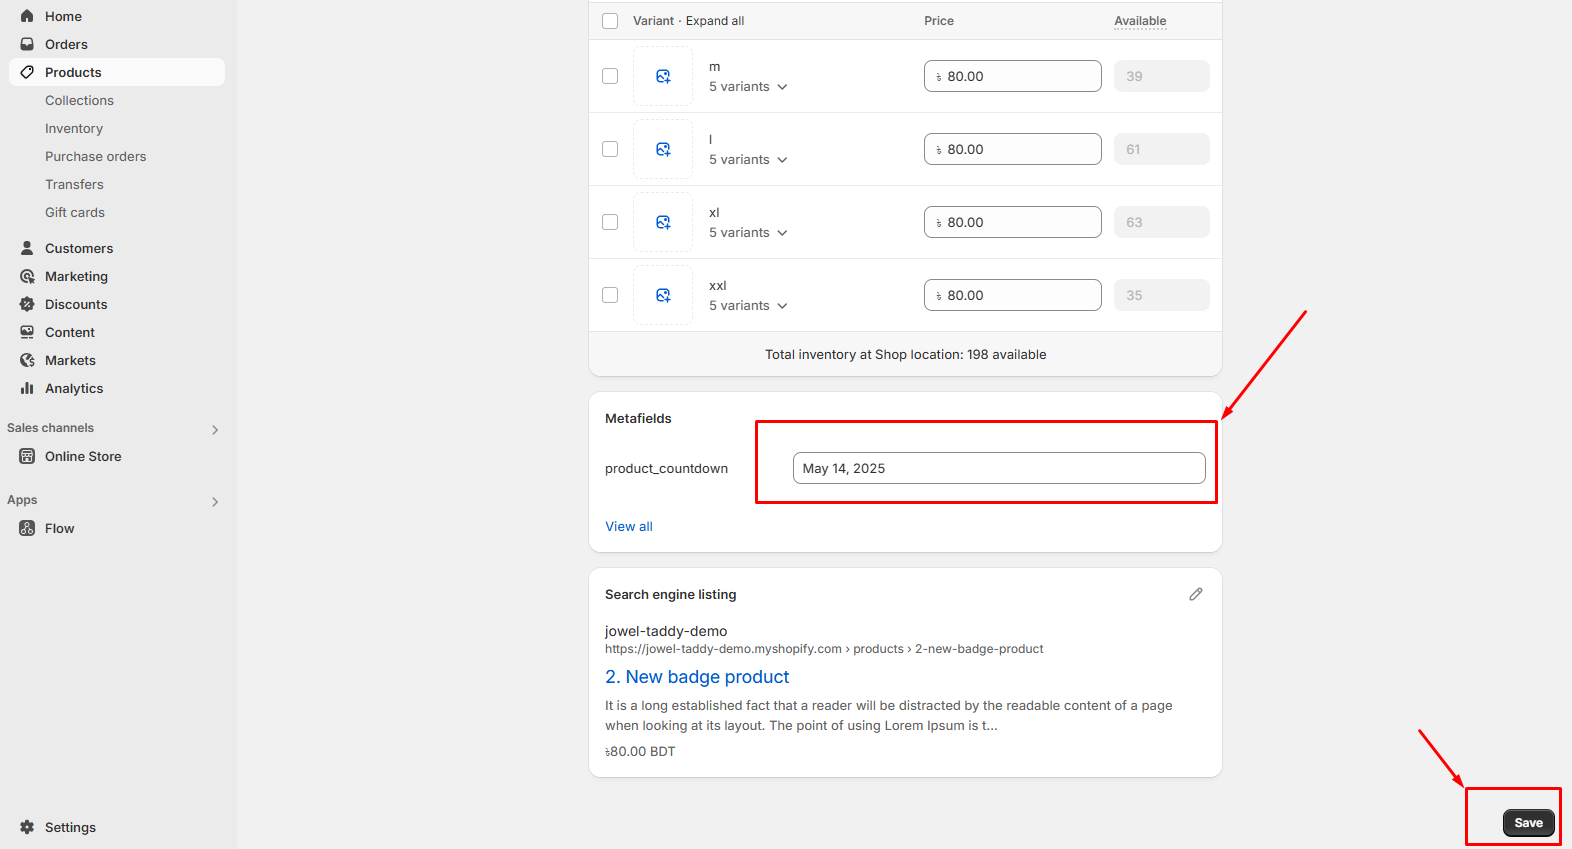
- 3. Displaying the countdown